

Mozzarella has become a staple in our house. We use it on just about everything. Of course pizza and calzones claim the top prize, but we work it into scalloped potatoes, enchiladas, burritos, grilled cheese sandwiches, and of course (the boys' favorite) string cheese.
First, A Bit of History
Mozzarella is a member of the Pasta Filata or "stretched-dough" cheese family. Mozzarella is probably the most famous in this cheese family which includes many distinguished relatives in Italy such as Bocconcini, Burrata, and Caciocavallo. An Arabian version is Majdouli, and there's the Mexican version called Oaxacan.
What Makes String Cheese, Stringy?
It is the particular way the casein protein and calcium interact at a certain temperature and acidity that gives this cheese its magical ability to s-t-r-e-t--c-h. At the precise acidity (between ph 5.2 - 5.4) and temperature (above 110° F ) the calcium in casein-based curd is released from the cheese. The calcium helps keep cheese firm, which is what you want in hard cheeses. Without the calcium, the casein protein loses its shape and realigns in a way which gives the curd unparalleled plasticity and work-ability. Once the cheese is cooled it loses its ability to stretch and will keep a sculpted form. As long as the curd is kept hot you can mold it into any shape. Keep in mind, however, the more it is worked and handled the tougher it becomes.
Cream does not contribute plasticity to the cheese, only the casein protein gives the stretch ability. Cream does play an important role in giving softness to the strong curd. Cheese made with full fat milk is considerably more luscious than cheese made with skim milk, which tends to be rubbery. So the more fat you can pack into mozzarella the better it will be.
There are two ways to acidify milk for making mozzarella, one is slow fermentation using bacterial cultures, the other is to quickly acidify the milk through the direct addition of a precise amount of acid. You can use citric acid, lemon juice, or vinegar.
I have used both these methods and found the fermentation method a little on the finicky side. You might not get a consistent product without lots of trial and error. Like I said, I've done it, but not since I had children. The direct addition of an acid, while needing to be precise, is a little easier for me to manage while overseeing our six active boys. So, while I do like not having to use an acid to make the cheese, at this point in time, it is better to know that I will have an edible and consistent tasting product at the end of the cheese making session, than taking the chance that I might not. I will put the slow method up one of these days for you guys but today I will go through the fast method. It is easily adapted to small or large amounts of milk and time available to make it.
You only need 30 minutes to an hour to make this recipe. If you have children, do it after they go to bed, for the first time, so you aren't likely to get distracted. In my experience it is better for the cheese and easier on the kids!

To start with, you need a gallon of COLD whole milk. Make sure the milk is COLD. If it is too warm the direct addition of acidity will curdle it and destroy any possibility of mozzarella making. If this does happen all is not lost, you could make Paneer with it. I will do a post on that in a later post.

You also need Lipase powder, rennet, citric acid, and salt.
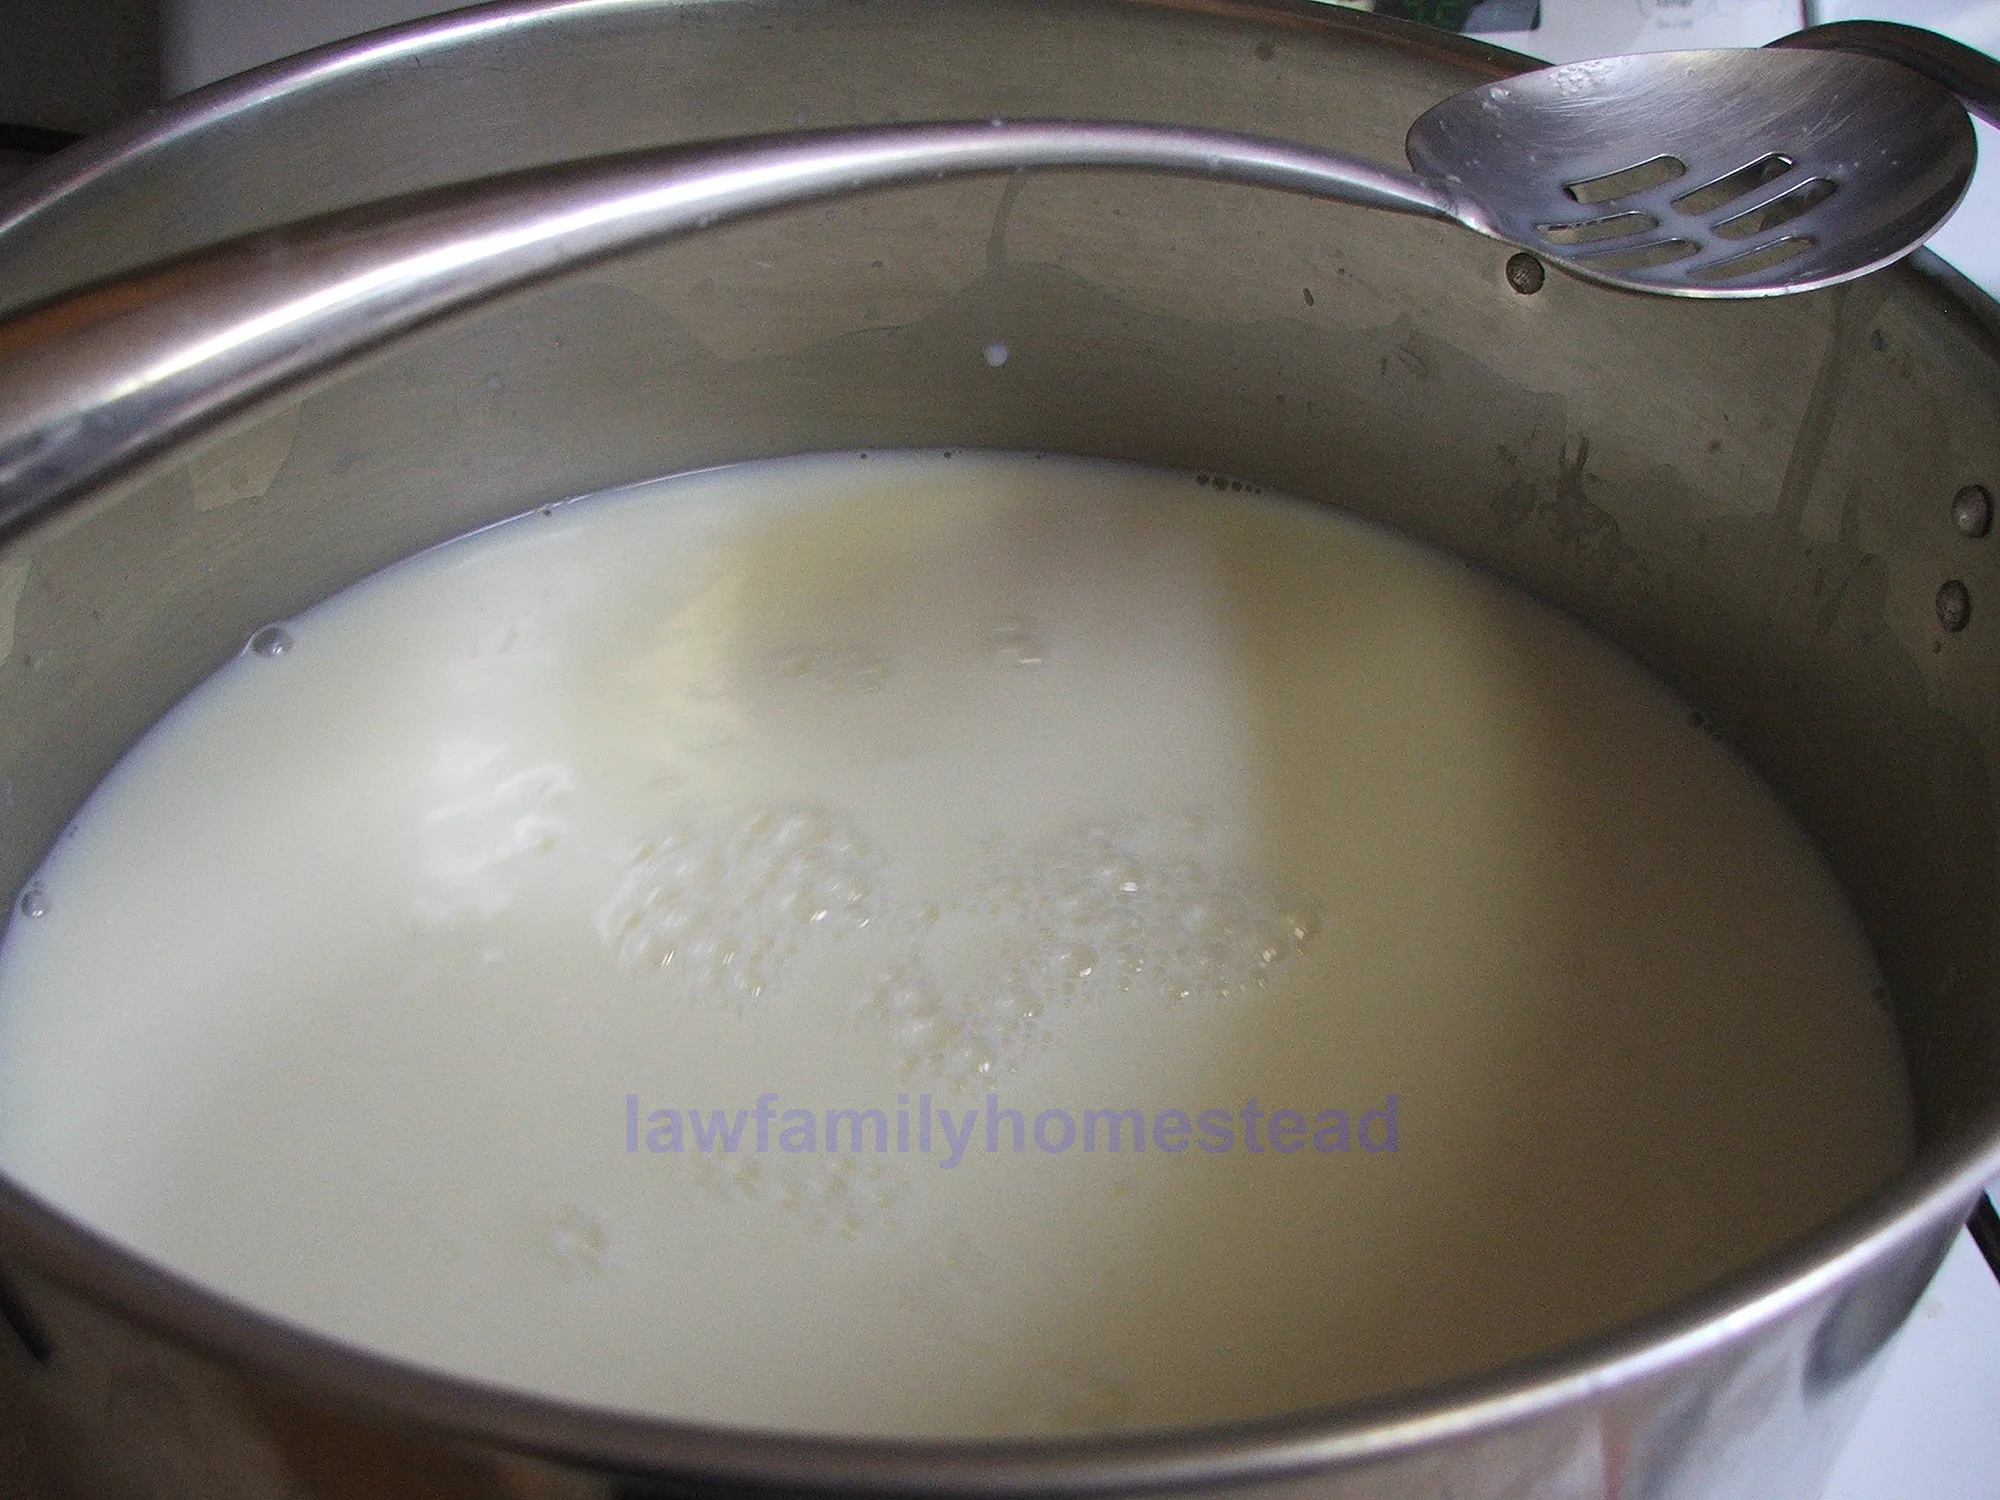
Pour the cold milk into a stainless steel pot.
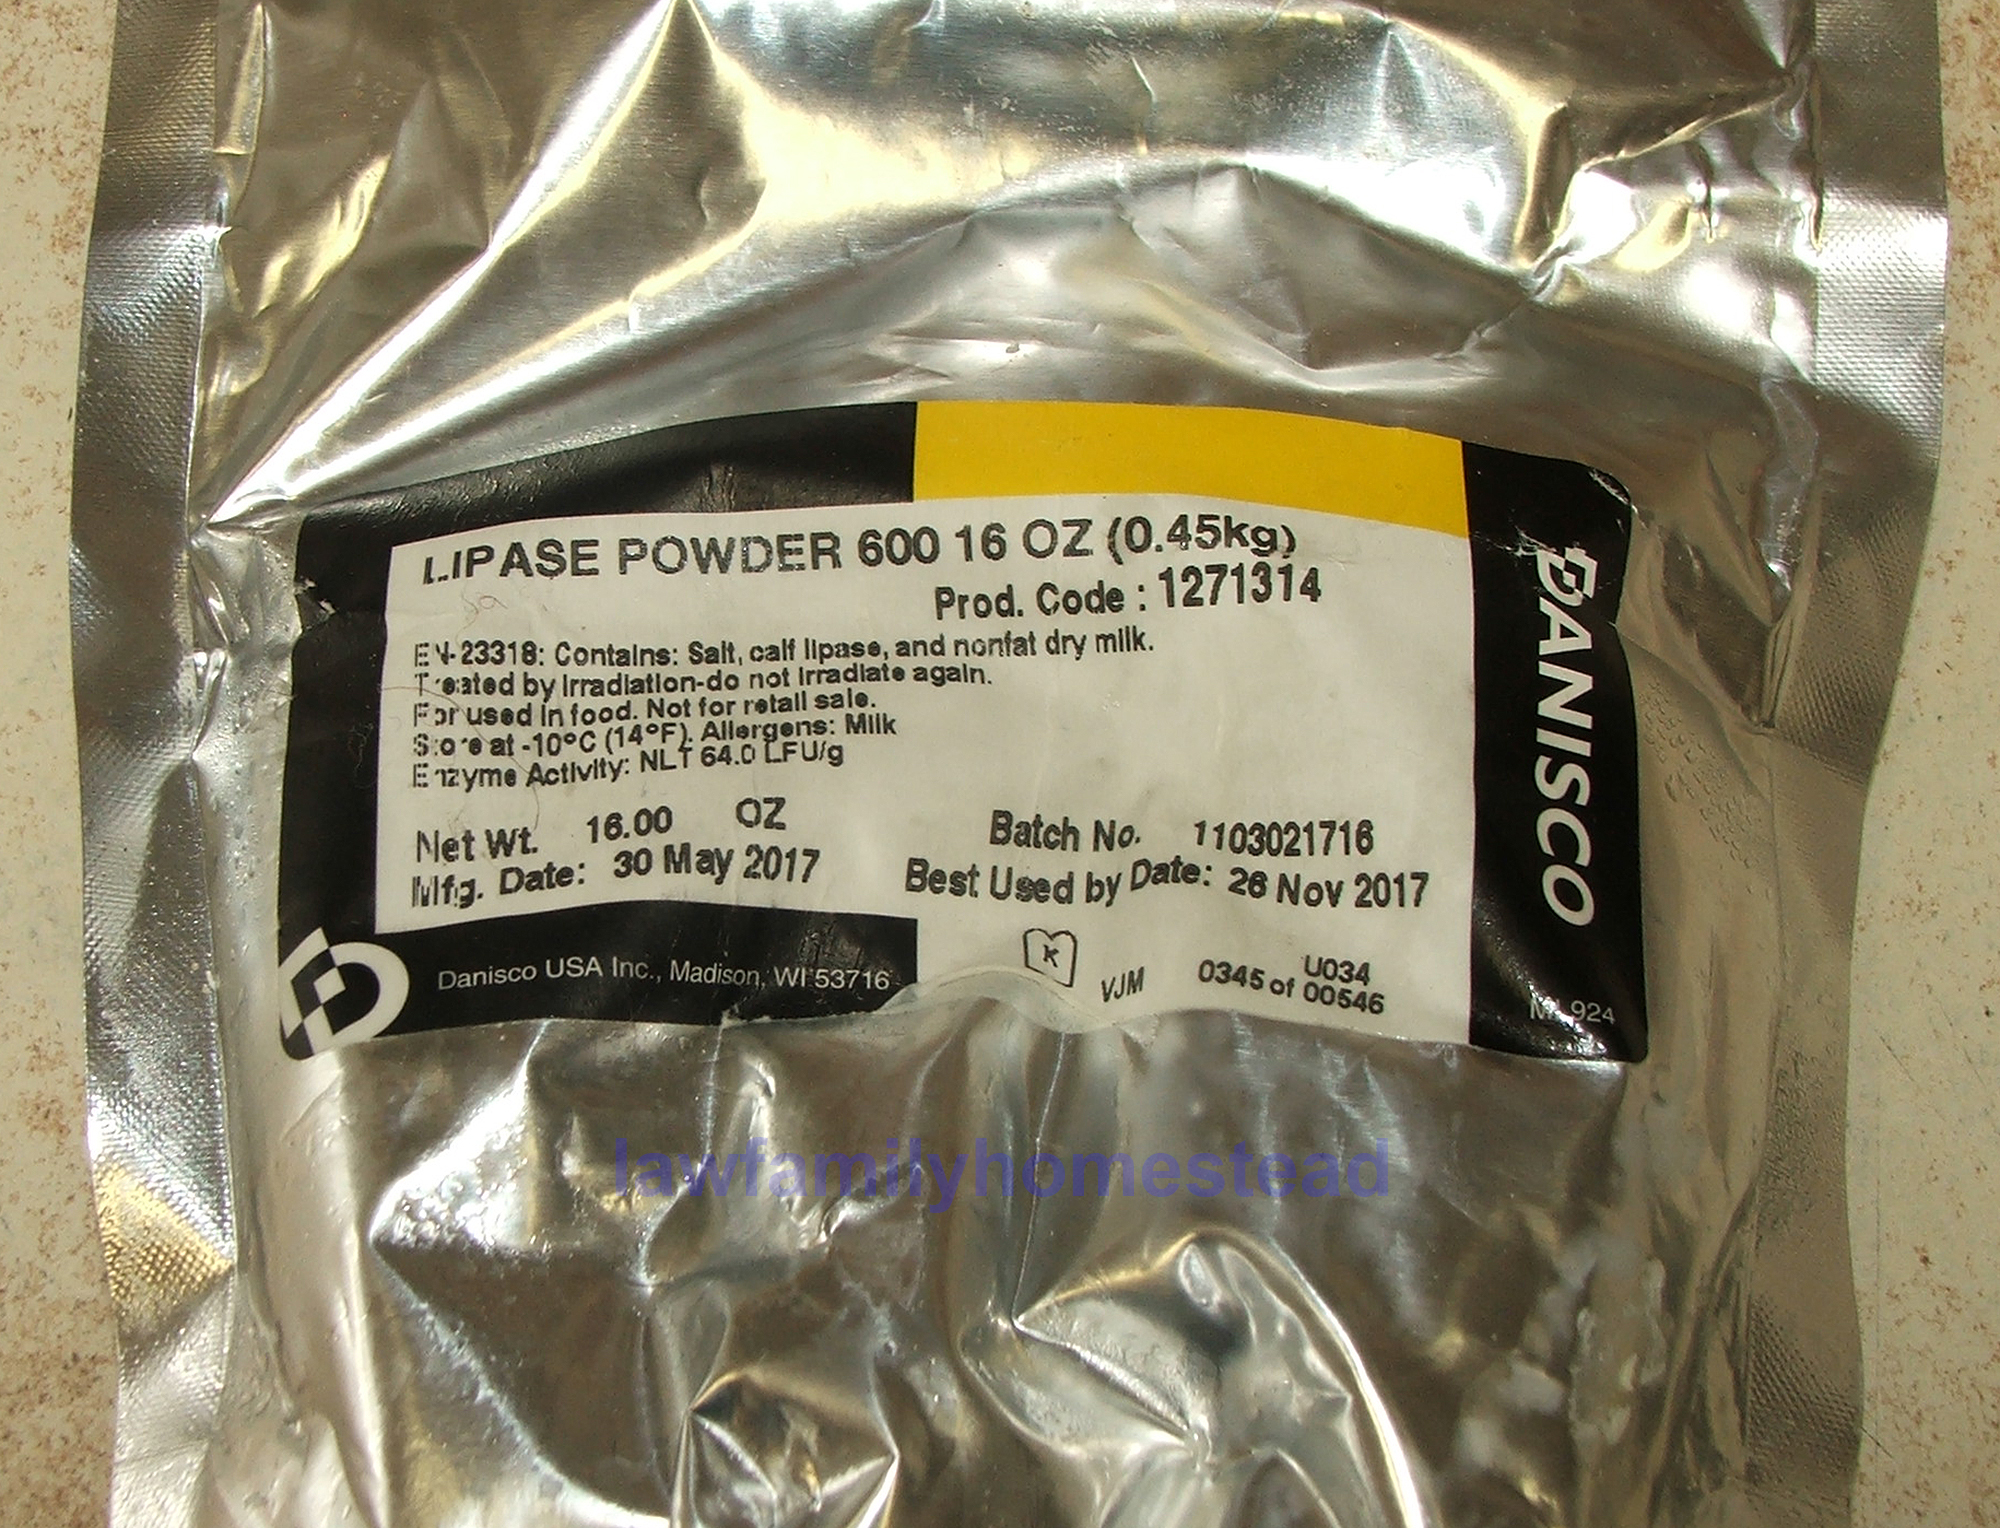
Add 1/8 teaspoon Lipase powder. You don't have to do this, it will be fine without it, but I do find that the mozzarella tends to be a bit "flat" tasting without it. The slow method calls for this, and I found if I just add it to the fast one also and allow it to sit a few minutes, and then proceed with the recipe, it improves the taste.

Next add the acid. I used citric acid for this batch as it's a little less finicky. You will need 1½ teaspoon citric acid added to a ¼ cup water.

Stir to dissolve, then pour solution into pot through a slotted spoon and stir briskly to incorporate the acid.

Slowly heat the milk to to around 90 degrees, baby bottle warm. Keep stirring. Quick heating or lack of stirring will create curdling.

Once it is warm, you will want to find your rennet. I use this kind, and find it very good. It's double strength so I can get by using less. I use about an 1/8 teaspoon.

Dilute the rennet in ¼ cup water, pour it into the milk, and stir.

And stir . . . and stir,

Until the milk begins to coagulate (becomes pudding like).

Keep stirring, it will get harder and harder to stir - keep stirring.

The cheese curds and whey will begin to separate. You will have yellowish whey and the white cheese curds.
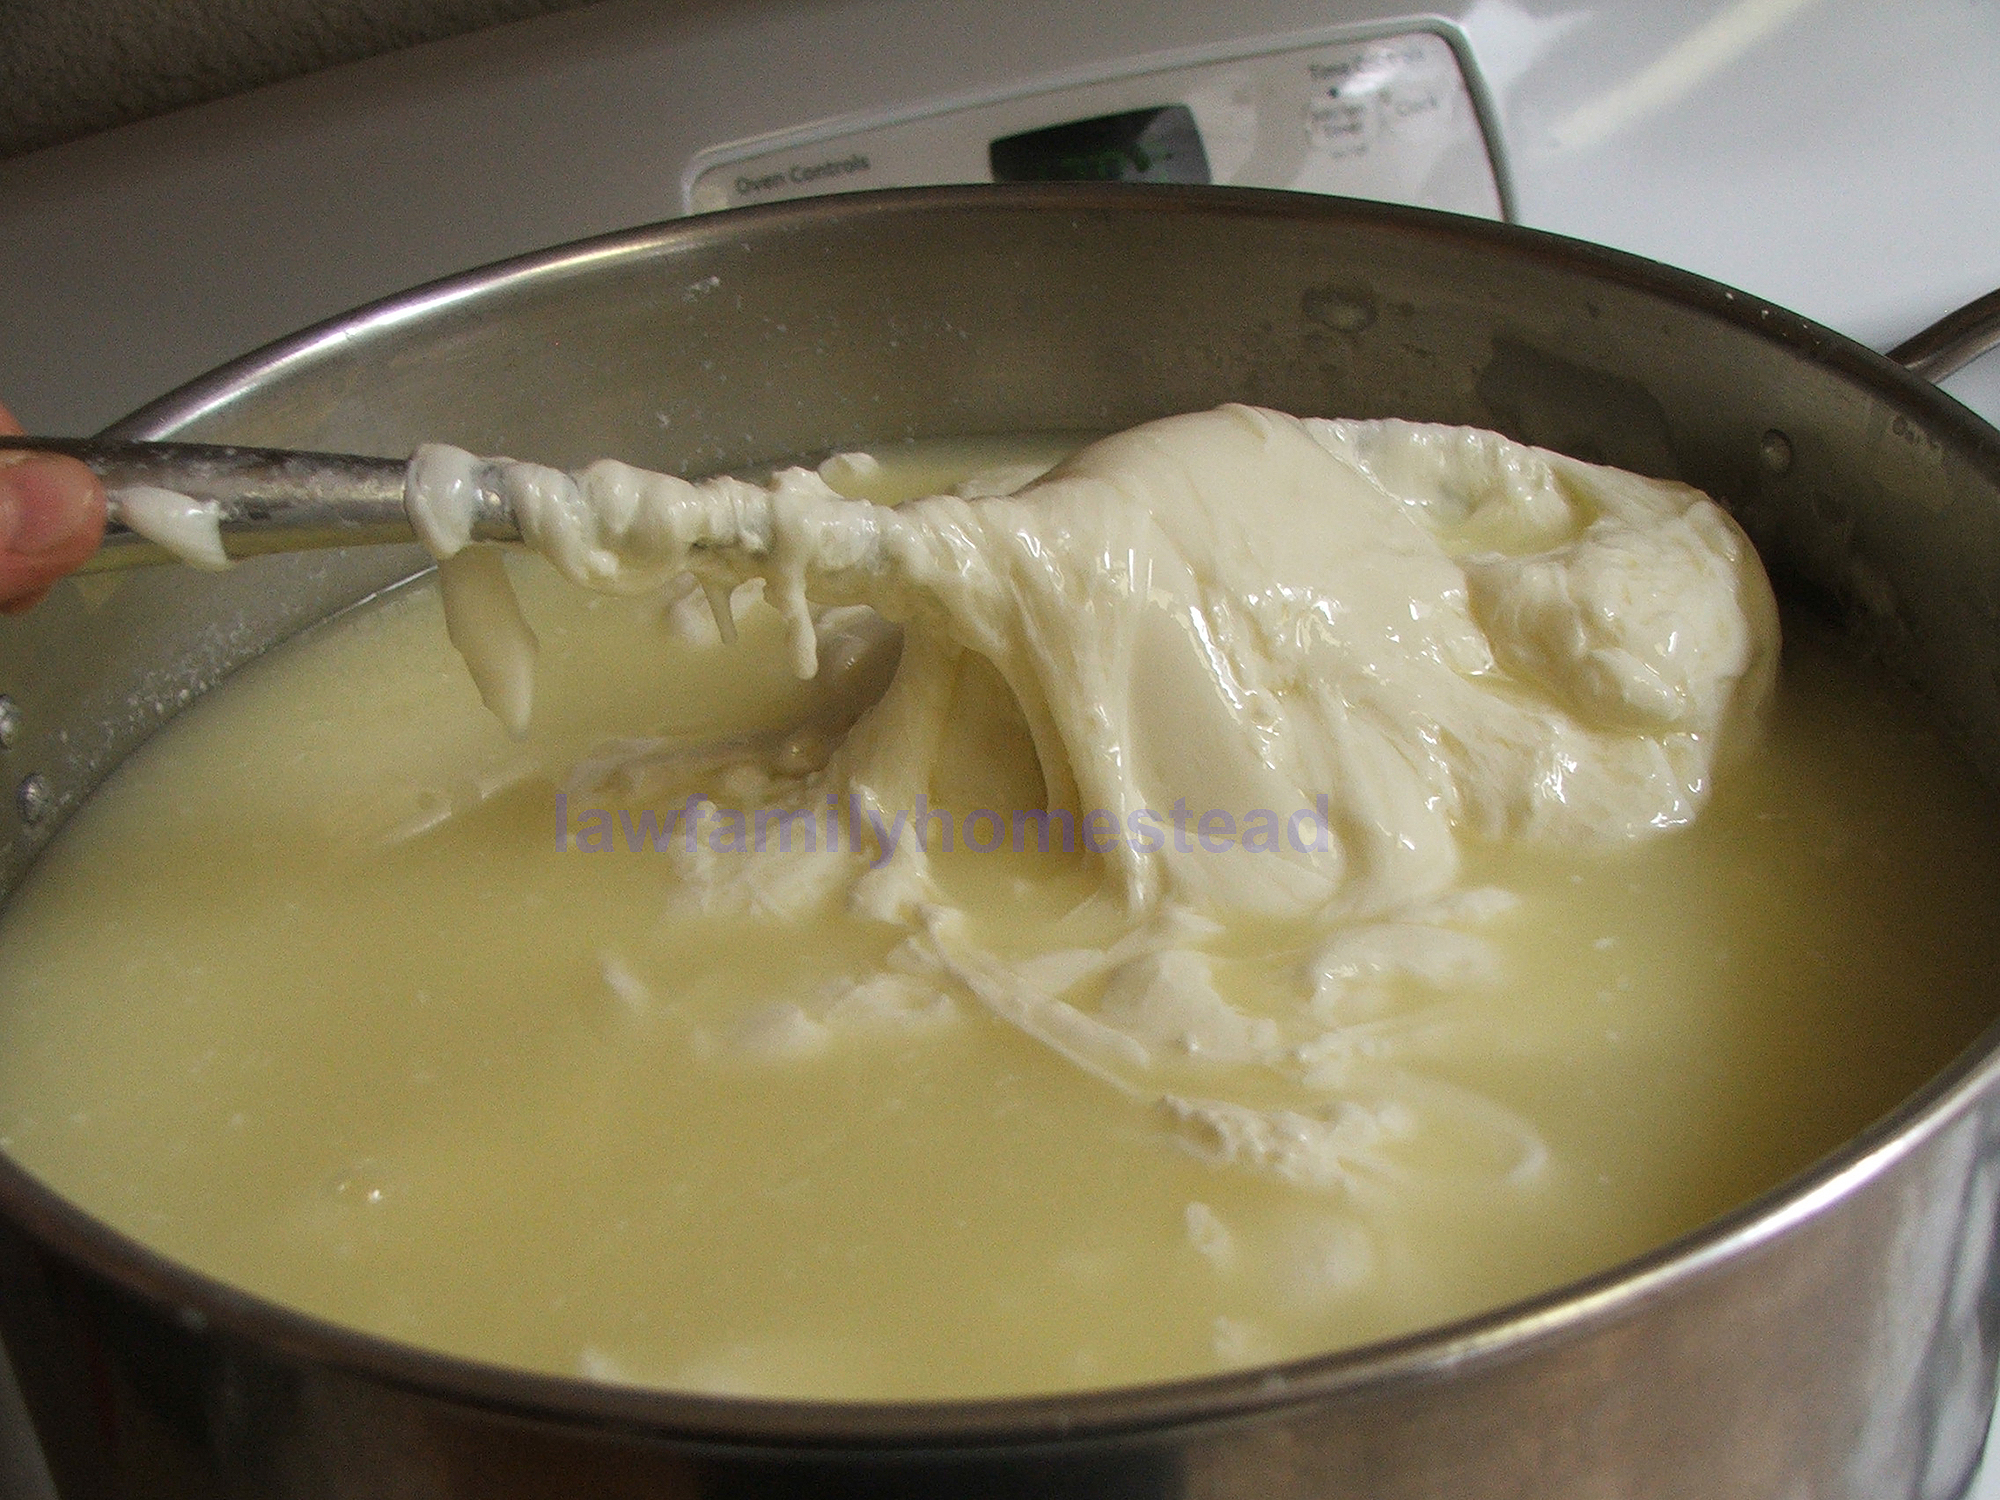
Keep stirring and it will start sticking together and become almost stringy. If it isn't stringy at this point don't worry, it should still work.

Allow the curds to sink to the bottom for a few minutes while you find a large pot. Fill it half full of water and dump in half a cup of salt. Heat this water to about 170°-ish or so. You don't want it boiling, just really hot - like when you see small bubbles on the bottom of the pot.

Then take your cheese curds and whey to the sink and pour off all the whey. You can press the cheese together with your hand to squeeze some of the whey out of the cheese curds as well.

It will look like this.

Gather the glob of cheese curds together and put them in the hot salt water, stir them around until they start to stick together, about 5 minutes or so.

At this point you can put on some rubber gloves and start slowly stretching it or just continue lifting it with a spoon. It will continue to melt and get shiny looking. As you pull it out and work it, it will become cold and brittle and the cheese strands will start breaking. Put it back in the water and allow it to warm back up. You want to keep it warm so it will be easy to work and stretch.

Continue stretching it by hand until it is very stretchy and silky. At this point you can stretch a small cord into a bowl of water making string cheese for the kiddies, or eat it warm out of the pot, ( absolutely divine!)

Or place it in some type of mold to cool down in the refrigerator and then use in your favorite recipe.

Be sure to cover the cheese with some plastic wrap so it doesn't dry out in the refrigerator.
Once you make this recipe a few times it will become easy. And it's a great recipe to make with a gallon or five gallons in a multitude of different ways. We've been using this cheese for everything that requires cheese in our household for years. It tastes great, and it is easy and FAST to make.
Happy Cheese Making!